Last update: 2025-November-26 | NEGMASTER BR Version: 2.1.1
User Guide Contents
*PLEASE NOTE THE USER GUIDE IS OUTDATED. SOME THINGS ARE STILL VALID WHILE OTHERS ARE NOT. WE ARE DOING OUR VERY BEST TO OFFER A NEW USER GUIDE ASAP*
General
User Interface – Master Module
- Image orientation buttons
- Copy settings button
- Conversion button
- Contact sheet button
- System info gauges
- Editing sliders
- Version Number / Update notification
User Interface – Conversion Options
- mklin Checkbox
- Invert Checkbox
- Gray Checkbox
- Reveal Checkbox
- Chrono Checkbox
- Sound Checkbox
- Load Balance
- Input ICC Profile
- Correction ICC Profile
- Output Profile
- Output Format
User Interface – Master Module > Contact Sheet
Workflow – Introduction
Workflow – Recommendations for Scanning & Conversion
- DNG Vuescan
- TIF Vuescan
- DNG Silverfast
- TIF Silverfast
- TIF manufacturer software / high-end scanners
- Planar .raw Pakon
- Planar .RAW Noritsu
- Planar .b48 Konica R1 DS-1000
- FFF Hasselblad / Flextight / Imacon
- DT Creo Scitex
Workflow – File preparation before conversion
- The Crop plugin extension
- The Planar Plugin extension
- Cropping/Orientation/Rotation
- Film Borders with sprocket holes
Workflow – Profiles
- Purposes
- Creating look / correction profiles in Photoshop
- Creating IT-8 profiles
- Editing the defaults.xmp preset template
Workflow – Converting
Workflow – Export
Workflow – Contact Sheets
Comfort Functions
General
Thank you for purchasing Negmaster BR. Please read these instructions carefully. If you have further questions you can reach us via the contact form or join the NEGMASTER group on Facebook for help from the community.
Installation
How to get Adobe Bridge
- Go to Adobe’s membership website and create a user account
- Download and install the Adobe Creative Cloud App
- From within the Cloud app, install Bridge
Install NEGMASTER BR on Windows
- Adobe Bridge must be installed on C: drive
- Unzip the Negmaster-BR.zip you downloaded
- Close Adobe Bridge, Lightroom and Adobe Camera Raw
- Install the resulting Negmaster-BR.exe via double click
- Ignore warnings regarding certificates/viruses – install anyway (no worries)
- After installation is finished open Bridge> Window > Extensions > NEGMASTER BR
- When the trial period has ended, NEGMASTER-BR will ask for your activation credentials.
- Please enter the serial you received via e-mail and your e-mail adress. The plugin will restart automatically after successful activation.
Install NEGMASTER BR on MacOS
- Download the .zip file for MacOS from your account
- After download double click on the .zip file to unzip
- Close Adobe Bridge, Lightroom and Adobe Camera Raw
- Double click on the pkg file to start the installer
- If you happen to run into the message “…can’t be opened because MacOS cannot check it for malicious software…” Please go to System Settings > Privacy & Security under the Security section and exclude the installer from quarantine.
- Please return to the pkg file and double click again. Confirm the dialogs.
- After installation is finished open Bridge> Window > Extensions > NEGMASTER BR
- When the trial period has ended, NEGMASTER-BR will ask for your activation credentials.
- Please enter the serial you received via e-mail and your e-mail adress. The plugin will restart automatically after successful activation.
Activation
After installation you can start NEGMASTER BR from the windows dropdown in the Bridge top menu bar. On first start, the plugin will be in trial mode, offering to convert 36 scans for free or using the other modules for 72 hours.
It will come up with asking for your activation credentials after converting 36 scans or when the 72h trial period is over.
Then it will ask you to enter your e-mail adress and license key. You can find your license key in the order confirmation email and in your account in the license keys section.
Please copy your license key and paste it into the text field via ctrl+c / ctrl+v. The plugin will validate your license key and if everything is correct, the plugin interface will show.
Activating can take up to five seconds, depending on server traffic or speed of your internet connection. If you are experiencing any problems please wait some minutes and try again. If activation is still not possible please open a support ticket.
Updating to a newer Version
You can check for the currently installed version on the bottom right of the Master module window. NEGMASTER BR will automatically check for updates on the Negmaster server. Once an update is available the version number will change to a clickable link “Update to Vx.x is available”. Simply click on the link. It will lead to your account on negmaster.com, where you can download the latest version.
On Mac: After downloading, the procedure for updating is the same as for the installation. The installer will overwrite the outdated plugin files.
On Windows: You may want to uninstall the old installation first by going to Windows settings > apps > uninstall apps.
Though the installer will overwrite the old installation and you won’t run into issues, older versions may remain in the Windows apps settings, what you may find unpleasant. Otherwise, the procedure for updating is the same as for the installation.
Deactivation
You can deactivate your license key for switching activations between different computers.
License key deactivation can be found in the settings module in the tab “License”,
Simply copy your license key and paste it into the text field and submit. After successful validation, license informations will be removed from your computer and the key will be deactivated online. Your license key can now be used for activation on a different computer.
Deactivating can take up to five seconds, depending on server traffic or speed of your internet connection. If you are experiencing any problems please wait some minutes and try again. If deactivation is still not possible, please open a support ticket.
Uninstalling
Windows
In case you want to sell your computer or want to use your license key on another device, you should deactivate before uninstalling. If you don’t do that and the computer is gone, the activation is lost because it’s bound to the machine’s ID.
Uninstalling is straight forward. Simply remove NEGMASTER BR via the uninstallation dialog in the Windows system settings.
MacOS
In case you want to sell your computer or want to use your license key on another device, you should deactivate before uninstalling. If you don’t do that and the computer is gone, the activation is lost because it’s bound to the machine’s ID.
Open a new terminal window and enter the following command:
rm -rf ~/”Library/Application Support/Adobe/CEP/extensions/com.negmaster.bridge”
Conversion button
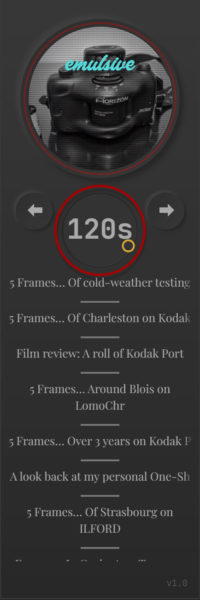
The conversion button is the most important button in the main panel. It’s main function is starting the actual conversion process.
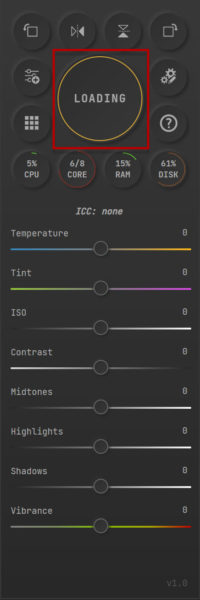
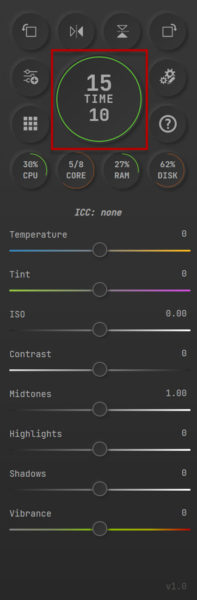
The button consists of three parts. The clickable button, the indicator ring and the info output as text in the middle. Whenever you interact with the conversion button it will change it’s state for giving you a feedback of the program’s current state.
These states can be:
- ready state – yellow ring with text ‘READY’
- error state – red blinking ring with text ‘🕱ERR🕱’
- queue state – white progress ring with text ‘QUEUE: (number of files in queue)’
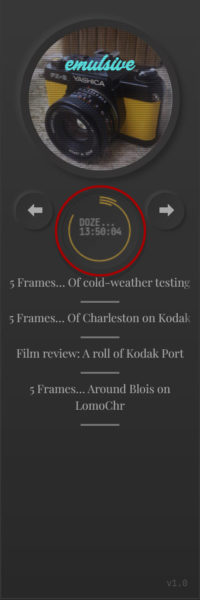
- chrono state – text with overall time needed to convert a queue of file in seconds and centiseconds
- done state – green blinking ring with text ‘DONE’ after converting a queue of files
- generate state – white progress ring with text ‘GENERATE’ while generating contact sheets
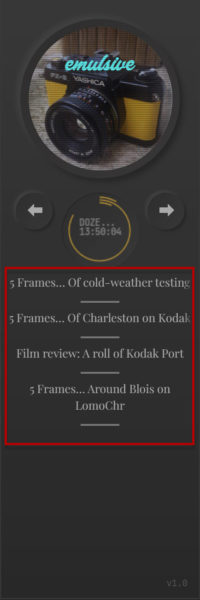
- doze state – button will show featured images of RSS feeds and slowly blink red
- loading state – text ‘LOADING’ while loading RSS feeds
- connect state – text ‘CONNECTING” when connecting to a RSS feed
- filetype state – text ‘FILETYPE NOT SUPPORTED” with red blinking ring
- skipped state – white progress ring with text ‘SKIPPED: (number of skipped files)’
Examples:


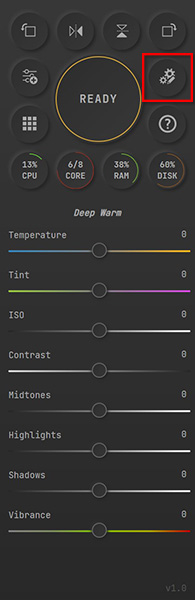
Conversion options button
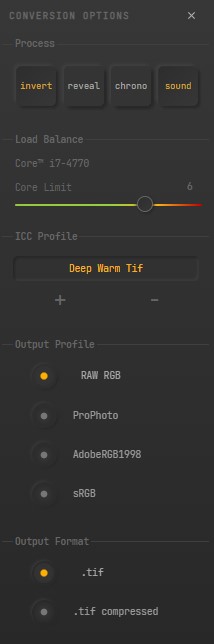
Clicking this button will open the conversion options panel where you can set adjustments for the process of conversion, output and load balance.
Contact sheet options button
Clicking this button will open the contact sheet options panel where you can make adjustments for the layout and output options when generating contact sheets.
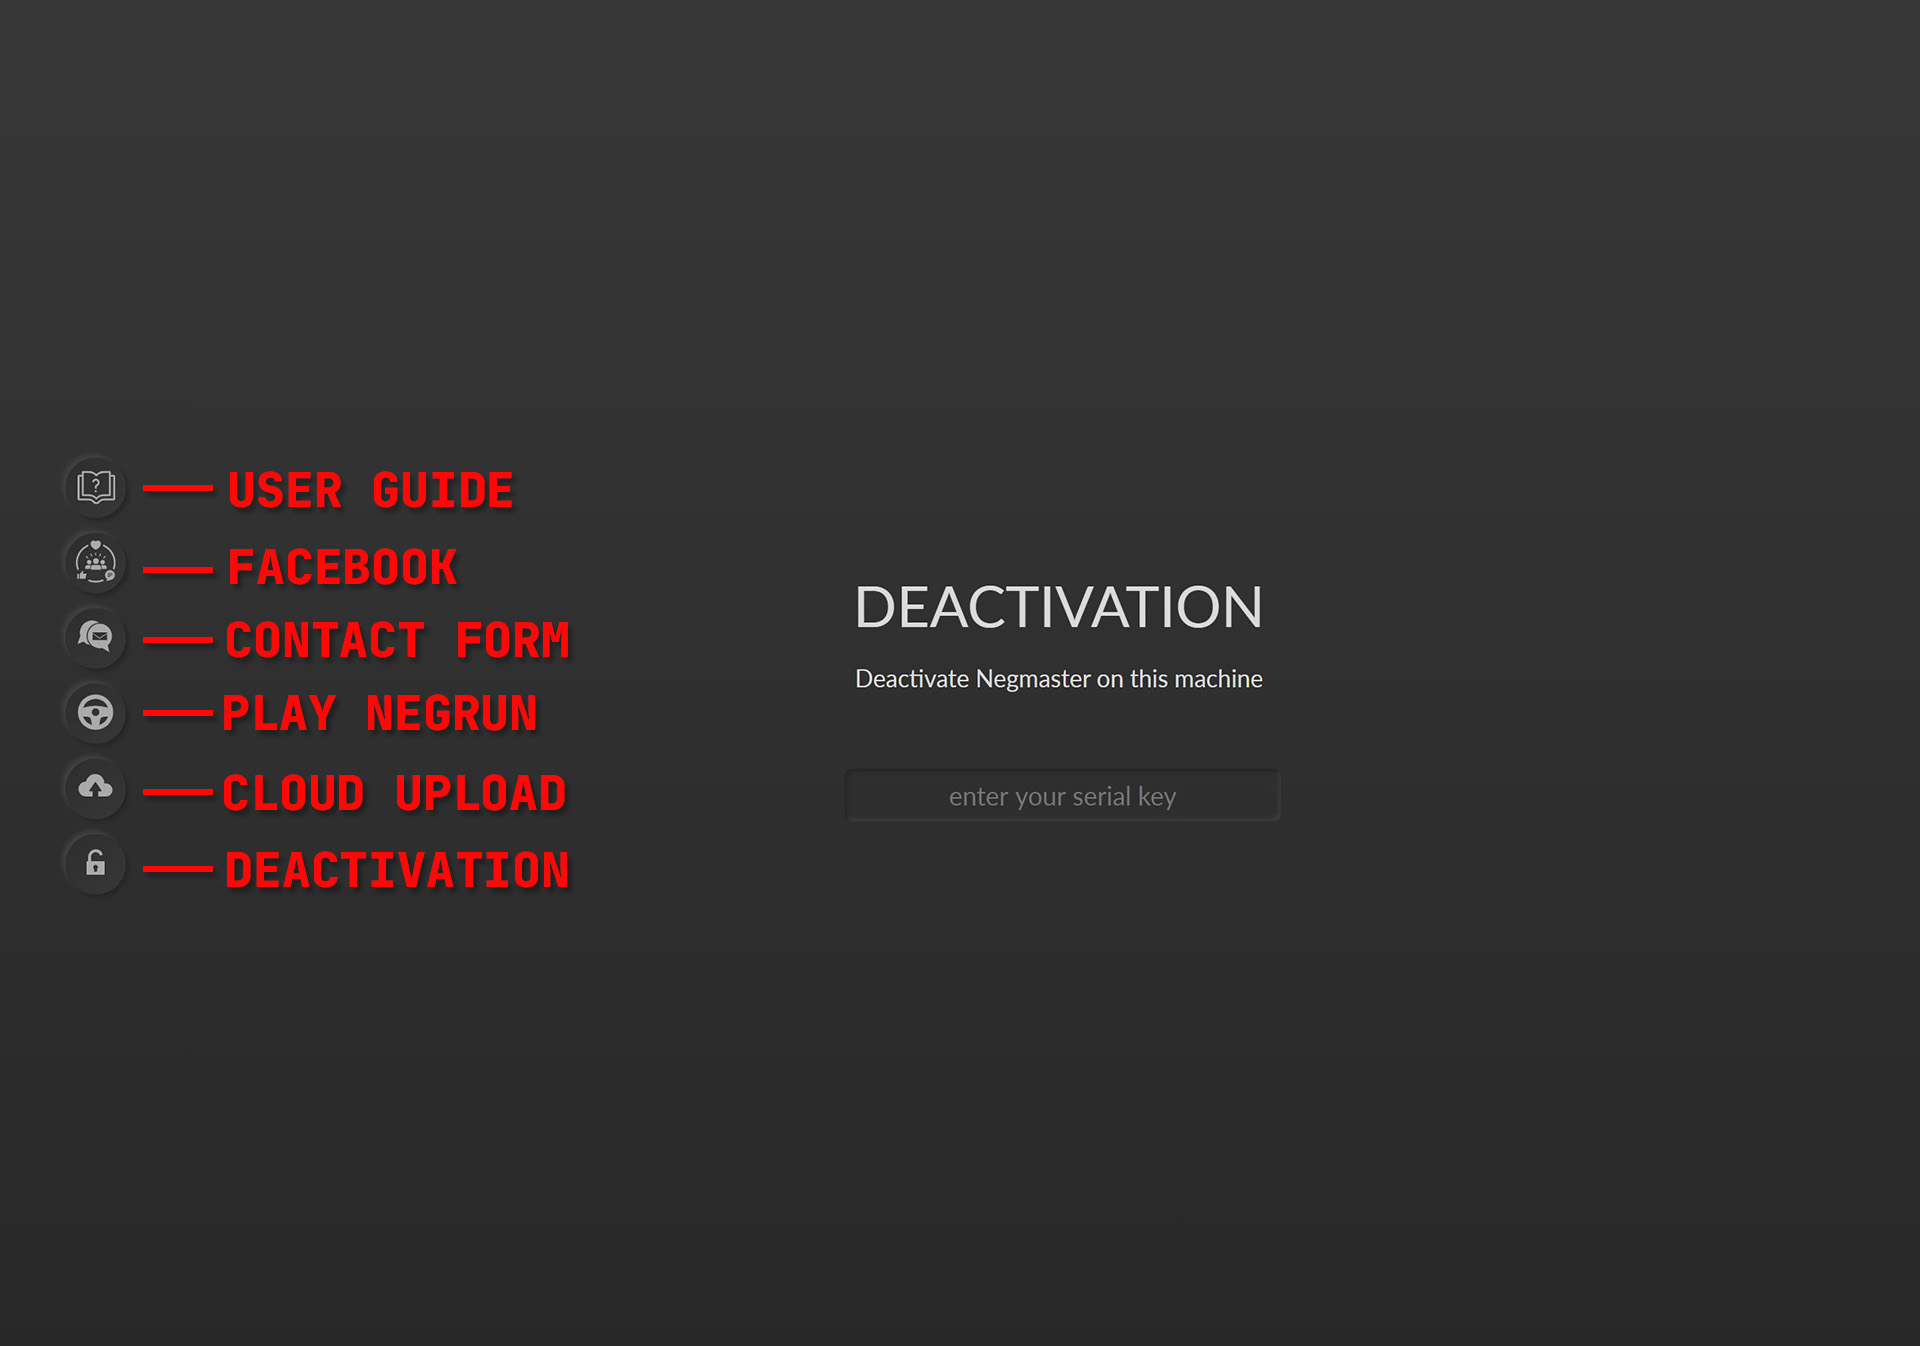
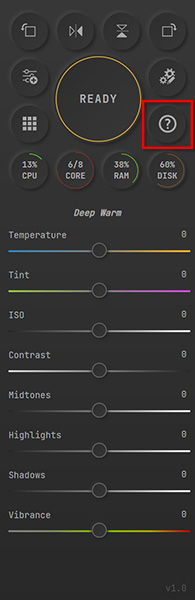
Help Button
Clicking this button will open the help plugin. In this plugin are further buttons that link to further functions:
- Opening the NEGMASTER BR user guide on negmaster.com
- Opening the NEGMASTERS Facebook group
- Opening the contact form on negmaster.com
- Play Negrun in the help plugin window
- Opening an upload interface in the negmaster cloud
- Deactivate your license key of NEGMASTER BR on the current machine
Sytem info gauges
The system info gauges exist for the purpose of showing you what the bottlenecks in your machine are. Users with consumer scanners that produce scans in the 20-200MB region usually don’t need to worry about them. Things are getting tougher if you are a large format or drum scanner guy. The gauges from left to right:
- real time CPU load
- load balance
- real time amount of RAM used
- real time amount of cache disk used
1 – CPU NEGMASTER BR runs parallel single threads for converting multiple images. The number of parallel threads is limited by the number of virtual cores of your CPU. This means for example if you have a 8 core CPU with multithreading activated, you have 16 virtual CPU cores. So you can convert 16 images at the same time in parallel.
If you selected more than 16 images for conversion – let’s say 32 images – the other 16 images are queued until a thread is done with converting. Then the next conversion will begin and the queue is reduced by one (the queue is than 15) until all images are converted.
Thing is, NEGMASTER BR is so effective at using your CPU cores, that it will easily eat up 100% of your CPU capabilities and your computer is literally blocked for any other work until the conversion is done.
The real time CPU load shows the overall CPU load on OS level. This can help you find processes that occupy the CPU before conversion begins. Like hidden system processes that are not shown in the CPU monitor of the Windows task manager. But it will also help adjusting load balance for keeping your computer responsive for other workloads.
2 – LOAD BALANCE shows the number of CPU cores used for parallel conversion threads vs the total number of CPU cores available. Load Balance can be adjusted in the Conversion Options Panel. NEGMASTER BR automatically identifies your CPU and will adjust to ‘total number of cores -1’ for making sure the machine will still respond to user interaction while converting multiple images.
Please note that converting long queues of high resolution images, that are easily larger than 1GB is a heavy workload for a machine, comparable to video or 3D rendering. Adjusting load balance can help keep your computer cool and reliable in countries with hot climate conditions.
3 – RAM shows the currently used RAM on OS level. Keep an eye on this gauge. When it shows 100% while conversion is running, the processes slow down significantly because data exceeding RAM will be outsourced to disk, which is much slower than RAM at reading and writing. You can work around that by reducing load balance number of cores used or terminating background tasks. If you are still in the 100% region you found a bottleneck and you should think about upgrading RAM.
4 – DISK shows the amount of used disk space where the plugin works on. Usually this is your boot drive (that is hopefully the fastest drive in your computer). The plugin will outsource data on this disk if RAM is 100% used. A drive that is nearly full will work slower than a drive that has sufficient free space. So keep an eye on this before running into a bottleneck.

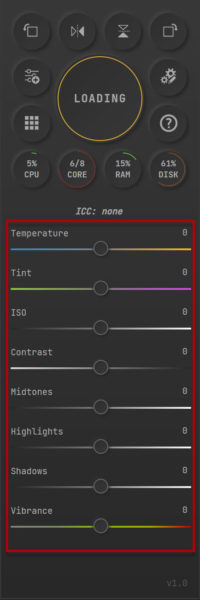
Editing sliders
The editing sliders are used for correcting the resulting .tif file after conversion. The changes you make are non-destructively written into .xmp metadata that can be read from Adobe Camera Raw and Adobe Lightroom alike.
All adjustments are standard adjustments you know from Adobe Camera Raw or Lightroom with the exception of the midtones slider that will adjust the composite RGB curve.
Once you made adjustments to an image, NEGMASTER BR is able to retrieve these values and will sync it’s slider values by simply selecting a thumbnail.
A right click will reset the slider to it’s default value. Accordingly it will reset the value for the selected images.
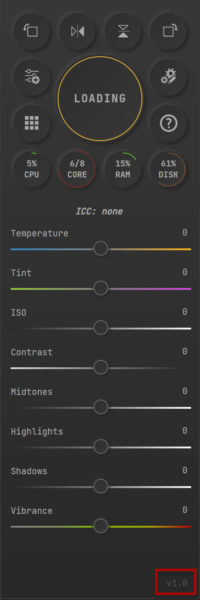
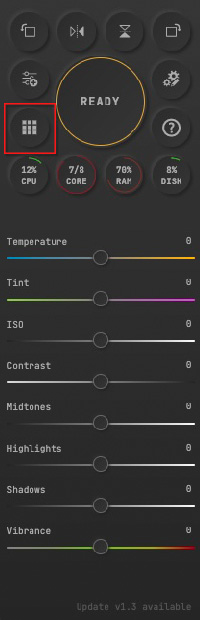
Version number / update notification
The version number indicates the current version of the plugin installation.
The plugin will call the update API on the negmaster server in 10 minute intervals. When it finds an update, the version number will change to a clickable link : ‘Update to Vx.x available’. The link will take you to the user account login page on negmaster.com where you can download the latest update.

User Interface – Conversion Options
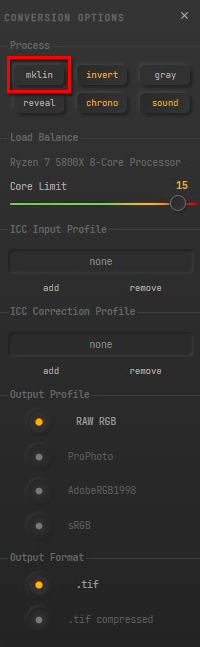
mklin Checkbox
When the mklin checkbox is checked, hitting the convert button will have the effect that all conversion settings are overridden and the selected files will be converted to linear .tif files without applying pixel calculations.
Linear tif means “RAW tif”. All profiles, gradation and meta will be stripped from the resulting files if possible. For DNG, .dt, .fff and tif files, gamma will be converted to 1. For .raw and .RAW files gamma will be converted to 2.2.
Linear tif files from mklin can then be converted in any software you wish.
This is especially useful for Noritsu and Pakon users as these files can be previewed and cropped in Lightroom or Bridge for final conversion in NEGMASTER BR.
Anyone else may like to use these files for archiving because you can be sure no details are lost and there is no artificial influence on colors by profiles. The output profile of mklin files is always RAW RGB (what means no profile is assigned on output).
Default: unchecked
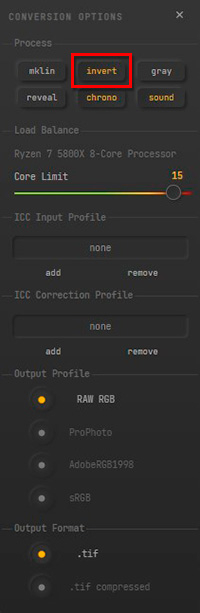
Invert Checkbox
The invert checkbox appears with yellow text when activated, indicating that the selected images will be inverted while processing. Unchecking the invert checkbox is useful if you want to convert negatives that were already inverted by the scanning software or if you want to process slides that have color casts that need to be corrected.
Default: checked
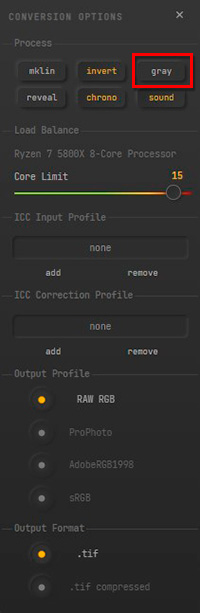
Gray Checkbox
The graycheckbox appears with yellow text when activated, indicating that selected images will be converted to single channel grayscale whilke processing. Unchecking the gray checkbox will output a three channel RGB image.
You want to use this checkbox when converting B/W film stock or when you want to convert color film stock to B/W.
Default: unchecked
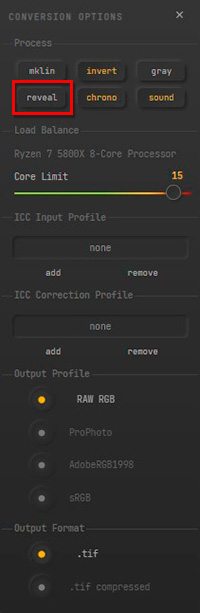
Reveal Checkbox
The reveal checkbox appears with yellow text when activated, indicating that selected cropped images will be uncropped after processing, revealing the film border. Unchecking the reveal checkbox will remove the film border while processing.
Please note that the reveal function has beta status, means it will produce irregular results at some point.
Default: unchecked
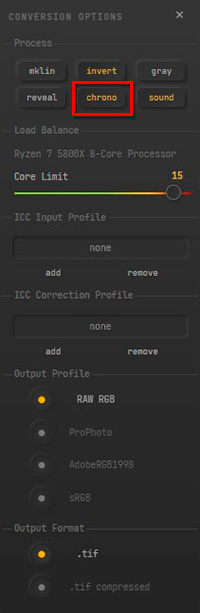
Chrono Checkbox
The chrono checkbox appears with yellow text when activated, indicating that the processing time will be measured and displayed in the conversion button after processing is finished.
Chrono is useful as a benchmark for comparing performance between systems and finding bottlenecks in system performance.
Default: unchecked
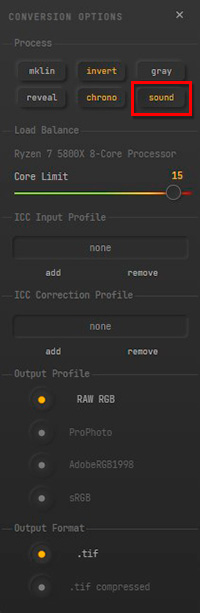
Sound Checkbox
The sound checkbox appears with yellow text when activated, indicating that sound will play on the event of conversion queue done (success sound) or conversion error (fail sound).
Sound is useful for longer queues of large images, where you want to do something else in the meantime and come back when conversion is finished or eventually ran into an error.
Default: unchecked
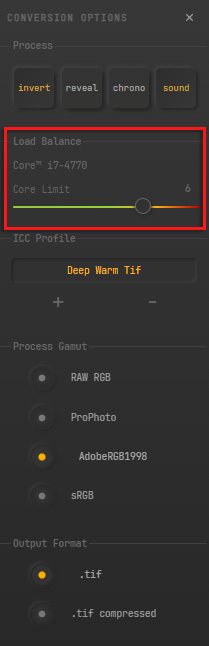
Load Balance
NEGMASTER BR automatically identifies your CPU and will adjust to ‘total number of cores -1’ for making sure the machine will still respond to user interaction while converting multiple images.
By using the load balance slider you can decide how many virtual CPU cores (parallel threads) will be used while converting multiple images. When converting many images, using all available cores can make your machine unresponsive for other tasks. Like browsing the web or working in Photoshop while converting. The load balance slider will free up some computing power for other needs.
Default: [total virtual CPU cores] -1
Input ICC Profile
The ICC input profile text box shows the currently active ICC profile that will be applied before conversion. ICC input profiles are “matrix only profiles”. Usually they are only a few KB in size and are used to calibrate the sensor response of the scanner to the it’s light source.
Depending on how far off the light source is, using a Input device profile can have larger or smaller effect. Usually, as long as your scanner doesn’t suffer serious lamp wear, using a special input profile isn’t needed. For pro level users, using an ICC input profile can make a huge difference. While testing, we noticed more natural skin tones and sky rendition.
Negmaster BR SC comes with ICC input profiles for a bunch of common scanners. The installer will copy them to your desktop.
These profiles were made using our own software for IT-8 profiling.
You can make your own IT-8 profiles. You need to buy an IT-8 target slide. Software that can make ICC device profiles is Lumariver, BasicColor, DcamProf, ArgylCMS, Vuescan and Silverfast.
You can add an ICC input profile by clicking on the ‘+’ button. A dialog will open that asks for an ICC profile. The plugin will save the profile in the plugin/profiles folder as ‘input.icc’ and will remember it when the plugin is restarted or the computer is rebooted.
A shorthand function for adding an ICC input profile is clicking on the ICC input profile name in the main UI panel.
The ICC input profile can be removed by clicking on the ‘-‘ button or by right-clicking the ICC input profile name in the main UI panel.
Default: Input ICC: none
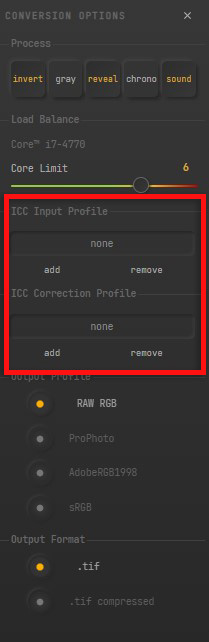
Correction ICC Profile
The ICC correction profile text box shows the currently active ICC correction profile that will be applied after conversion, before color space transformation. ICC Correction profiles can be useful if you have a regular unexpected output quality from the program. For example, if you notice a slight blue color cast in every result, you can make an ICC profile that compensates for this issue.
Another purpose can be that you want to achieve a certain look. Like the minilab look or the look of printed colors. The ‘deep warm’-profile that comes with NEGMASTER BR is such a look profile.
Correction and Look profiles can be easily made with Photoshop. This is explained in the ‘Workflow – ICC correction Profiles’ section of this user guide.
ICC correction profiles can also be used for assigning an IT-8 input profile that can be made with the help of softwares like dcamprof, Basiccolor, GrossGrade or Lumariver.
You can add an ICC correction profile by clicking on the ‘+’ button. A dialog will open that asks for an ICC profile. The plugin will save the profile in the plugin/profiles folder as ‘user.icc’ and will remember it when the plugin is restarted or the computer is rebooted.
A shorthand function for adding an ICC correction profile is clicking on the ICC Correction profile name in the main UI panel.
The ICC correction profile can be removed by clicking on the ‘-‘ button or by right-clicking the ICC Correction profile name in the main UI panel.
Generally, ICC correction profiles are not so much needed when converting DNG files. TIF files have a larger benefit here. It’s difficult to speak about a general recommendation which format is better suited for converting in NEGMASTER BR. This depends pretty much on the scanner and the scanning software.
Negmaster BR comes with a bunch of profiles. The installer will copy them to your desktop.
Default: Correction ICC: none
Output Profile
The output profile checkboxes show the available profiles that can be used by NEGMASTER BR for assigning a output color space.
- RAW RGB is the scanner’s device color space. Color gamut remains untouched while converting. Often best choice for high end scanners.
- ProPhoto RGB is a very wide color space. Colors from scans from devices with a gamut narrower than ProPhoto RGB will be stretched and therefore appear with a lack of saturation. We never came across a scan that worked well with ProPhoto. It’s there for future compatibility.
- AdobeRGB is a wide color space that is sufficient for exchange between different devices. Most semiprofessional monitors cover this gamut. It’s the best compromise for further editing.
- sRGB has a comparibly narrow gamut but prevents oversaturation on amateur monitors from scanners exceeding the sRGB gamut
From our experience Adobe RGB or RAW RGB work best for scans from manufacturer softwares in combination with the TIF file format. For .raw and .RAW planar files from Pakon and Noritsu RAW RGB and sRGB are recommended.
More modern consumer devices like Plustek and Reflecta are working best with sRGB when scan softwares like Vuescan or Silverfast were used for scanning with DNG output. Results may differ across devices. You should run some comparison tests before deciding which output profile you will finally use.
Generally oversaturation in reds and greens or greenish skin tones are good indicators for a wrong output profile. Mind you, this is just an output profile. What means it has no effect on actual pixel data. It’s just a meta tag that can be removed or newly assigned with most programs for image editing.
Default: AdobeRGB 1998
User Interface – Contact Sheet Options
Custom Heading
Here you can enter a custom heading for your contact sheet.
The default heading is ‘Contact Sheet [folder name]’. A custom heading will replace the default heading.
If you want to return to the default behaviour, simply enter the word ‘default’.
Default: ‘default’

Layout
The grid picker on the left is for choosing how many rows and columns your contact sheet will have.
Simply hover over the grid until you reached your desired layout, then left click to confirm.
If you choose no layout with the grid picker, the contact sheet will use the default value
Default: 6 columns, 7 rows
Background
Here you can choose the background color for your contact sheet. If you want to print the result, you should go for a white background to save ink.
Default: white
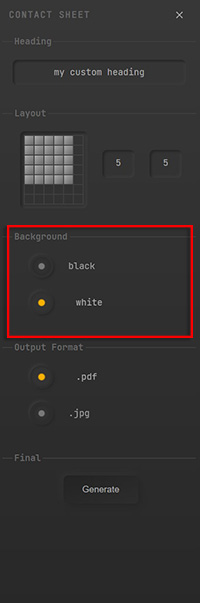
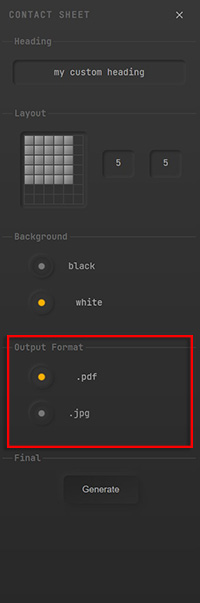
Output Format
A contact sheet can have two different output file formats, JPG or PDF.
If you have more images than a single sheet can contain, the resulting PDF will be a mutlipage file, while the JPG format will generate multiple files.
Default: PDF
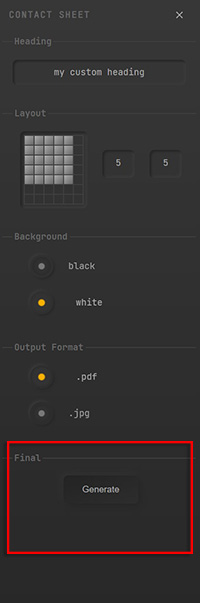
Final
The final section contains the Generate button. Clicking it will start generating the contact sheet for the selected TIF and/or JPG thumbnails according to the settings you made in the Contact Sheet Options. If no thumbnails are selected, it will generate a contact sheet for the whole folder
Workflow – Introduction
NEGMASTER BR in easy words
The conversion settings
The main concept behind the plugin was ease of use. And that’s why there is actually not much to say about the workflow. It does nearly everything automatically. There are five basic options in the Conversion Options Panel a user can set for letting the program know what to do with the files that are selected:
- Invert for negatives / not invert for slides or already inverted scans
- Reveal for revealing film borders after cropping
- ICC profile for optional looks or corrections
- Output color space
- Compressed or uncompressed output
For everything else there is a logic, that determines what to do if a condition is met or not.
Actually, most people won’t even need to change anything. Because the default settings fit most use cases. Users of high end scanners like Heidelberg, Imacon and so on will probably need to make adjustments fitting their scans better (output color space and ICC profile). But i guess those people know pretty well what they’re doing.
The actual conversion
Well, it may sound not sound spectacular but it’s just this:
- select the thumbnails you want to convert and hit the convert button
Just make sure you scanned your frames straight and without remains of the scanner’s light source / film holders. Otherwise you need to crop those remains away before converting.
Post editing
The plugin has sliders for editing the resulting TIF files directly in Bridge. We broke that down to a minimum because we wanted to avoid overload. These are the sliders you would want in the first place when correcting the conversion results. And they do the job just fine. You can edit multiple images at the same time. Just select them and start dragging.
Exporting
Developing versions of the plugin had the ability to directly convert to JPG while processing. But in the end we ditched that because the export panel in Adobe Bridge is just brilliant. It’s a pleasure to use. Drag and drop on your custom export preset: done. No need for own functions here.
Contact sheets
Same here, not much to say. there are some options you can make for the layout, heading, background color and file format. Simply select the thumbnails you want, hit generate: done.
If things go wrong
Murphy’s law. Things will go wrong at some point. Mostly this is related to some flaw in or on the film emulsion. Sometimes it’s omething else or the user’s taste that is not met. For the latter you can use ICC profiles. You can easily create them yourself. But as far as we can tell NEGMASTER BR is quite good at ‘guessing’ what you like.
Workflow – Scanning Recommendations
DNG Vuescan
Below you will find the recommended settings for scanning RAW DNG with Vuescan.
Settings Input tab
- Options: Professional
- Task: Scan to file
- Mode: Transparency
- Media: Image
- Bits per pixel: 48bit RGB
- Auto save: Scan
Settings Output tab
- Raw file: checked
- Raw file type: 48bit RGB
- Raw output with: Scan
- Raw Compression: Off
- Raw save film: checked (if you want IR embedded)
- Raw DNG format: checked
Settings not mentioned either have no impact on the result because we are scanning RAW or are not recommended. However, if you are used to scan with different settings like using analog gain etc… you may use them if that fits your taste better.
Please note that adjustments in the Color tab don’t affect raw scans as long ‘Raw save film’ is unchecked. If ‘Raw save film is checked’ Vuescan will (partly) embed changes made to the image data, what can affect results when converting in NEGMASTER BR.
TIF Vuescan
Below you will find the recommended settings for scanning TIF with Vuescan.
Settings Input tab
- Options: Professional
- Task: Scan to file
- Mode: Transparency
- Media: Image
- Bits per pixel: 48bit RGB
- Auto save: Scan
Settings Filter tab
- Infrared clean: to your liking
- Restore colors: unchecked
- Restore fading: unchecked
- Grain reduction: to your liking
- Sharpen: None
Settings Color tab:
- Color balance: Neutral
- Black point (%): 0
- White point (%): 1
- Curve low: 0.25
- Curve high: 0.75
- Brightness: 1
- Brightness Red: 1
- Brightness Green: 1
- Brightness Blue: 1
- Scanner Color Space: Default
- Output color space: Device RGB
Settings Output tab
- TIFF file: checked
- TIFF file type: 48bit RGB
- TIFF compression: Auto
- TIFF profile: unchecked
Please make no other adjustements to the image data if you don’t know what you’re doing. You can set white balance or other editing options but you have to expect oversaturated results. Instead we recommend scanning “as is” and assigning a correction profile in NEGMASTER BR.
DNG Silverfast
Below you will find the recommended settings for scanning RAW DNG with Siverfast 8/9.
Main Interface
- Material to scan: Positive
- Output Color Format and Bit Depth: 48 bit HDR RAW
- File Format: DNG
Settings not mentioned either have no impact on the result because we are scanning RAW or are not recommended. Silverfast cannot embed ICE/IR information in 48bit RAW DNG files. We are working on converting 64bit files with IR channel embedded.
Meanwhile, if you want to have IR information embedded, please switch to the tif file format.
TIF Silverfast
Below you will find the recommended settings for scanning TIF with Silverfast 8/9.
Main Interface
- Material to scan: Positive
- Output Color Format and Bit Depth: 48 bit
- File Format: TIFF
Please make no other adjustements to the image data if you don’t know what you’re doing. You can set white balance or other editing options but you have to expect oversaturated results. Instead we recommend scanning “as is” and assigning a correction profile in NEGMASTER BR.
Note for users of Silverfast 6 and earlier: Unfortunately, these early versions embed exif data in a bad format (entries in ExifIFD0). Please use the “Clean Meta” button on these files to fix this issue.
TIF manufacturer software / high-end scanners
recommending settings for this very wide spectrum of different scanning programs is close to impossible. But we can give you a general guidance that is valid for nearly any software. The results from converting scans from the manufacturer programs are often better than scanning with third party software because calibration is more accurate. But that is no rule of thumb. Results widely differ across different scanners.
- Scan your negatives as they appear on a light table. Don’t try to ‘linearize’ or ‘enhance’ them by changing exposure, contrast, saturation, white balance etc… You may do this if you found out this or that optimization fits your taste better. But for the beginning we recommend starting with a neutral positive scan as a base.
- Use the highest output bit depth the program offers. NEGMASTER BR will work with 24 to 48bit color depth (64bit is in the pipeline)
- Stay in device color space when saving. Just to make sure no information is lost.
- When compressing TIF before conversion in Negmaster BR, make sure it’s a lossless compression
- Dust is true color’s biggest enemy, because it induces wrong black/white points. Make use of ICE if your scanner offers it. If not, you should remove it in Photoshop before conversion. Or even better, simply don’t scan with dust on your negatives.
- Don’t scan with sprocket holes or remains of the scanner’s light source or film holders. Draw the scanning frame around the image content. Slight remains of the film leader are ok if you want the shadows in your image content to stay ‘open’.
The scanning frame is the area the scanner uses for calculating density/exposure. Everything in the frame will be part of the calculation. And everything that doesn’t belong there will lead to wrong exposure of the image content.
Dainippon Screen running on DTS
- Scan without Nega
- Scan positive flat ‘as is’
- AI channel standard
- 8bit TIF output (will be internally converted to 16bit in NEGMASTER BR)
Creo Scitex Eversmart Series running Oxygen
- Scan negatives without inverting; flat ‘as is’
- Mode: Color RGB 16bit (if possible; else 8bit)
- Media: Positive
- Choose Input Profile Transparent
- Choose Output Profile to your liking
- Do not use SmartSet tables
- Don’t set End Points/Gradation
Scitex 3xx Series
- Scan negatives without inverting; flat ‘as is’
- Type: Transparent
- Mode: Color RGB
- Media: Positive
- Don’t set End Points/Gradation/Color Correction
- Don’t use Sampler
- 8bit TIF output (will be internally converted to 16bit in NEGMASTER BR)
Heidelberg Newcolor/Linocolor
- Scan negatives without inverting; flat ‘as is’
- Film Type: Standard
- Scan Mode Color
- Color Space: RGB
- Don’t use Color Assistant or other editing functions for gradation/endpoints
- If possible 16bit TIF output
- 8bit TIF output (will be internally converted to 16bit in NEGMASTER BR)
Eurocore/HiScan
- Scan negatives without inverting; flat ‘as is’
- Don’t use editing function for gradation/endpoints
- Support Type: Transparent Mode
- Color Mode: RGB
- Color Corrections: None
- B/W Setting: W: 255,255,255 B: 0,0,0
- Support Profile: None
- 8bit TIF output (will be internally converted to 16bit in NEGMASTER BR)
ICG 355/360 ScanXact
- Scan negatives without inverting; flat ‘as is’
- Don’t use editing function for gradation/endpoints
- Medium: Transparency Extended Range
- Mode: RGB
- Highlight, Shadow and Gradation Controls set to 0
- 8bit TIF output (will be internally converted to 16bit in NEGMASTER BR)
Purup Eskofot Scanmate 11000 / Scanmate F8 Color Quartet
- Scan negatives without inverting; flat ‘as is’ (No ‘Negative Developer’)
- Don’t use the Color Tools Palette
- Don’t set custom B/W points or gradation
- GrayBalance: 0; Highlight/Shadow: None…
- Use your own RGB profile or a ColorSync Profile
- RAW TIF 16bit RGB output
“Planar” .raw files from Pakon scanners
Planar RAW files can be scanned with TLX Client demo. It comes with the original software for Pakon scanners and was intended as a demo for the capabilities of the TLX API.
Planar .raw files have no header metadata. Hence it’s difficult for a program to automatically convert them without knowing the image dimensions or bit depth etc…
Basically, we’re dealing with files from two series of devices. The first is Pakon files from TLX client demo and the second is files from Noritsu scanners. Both series of scanners are using different output image dimensions, resulting in different image filesizes. The file extension from TLX client demo is always “.raw” while from Noritsu scanners it’s “.RAW” in capital letters.
When converting .raw files from Pakon, please make sure the file extensions are always written in lowercase letters. The plugin uses the difference between lowercase and uppercase letters to determine the conversion method between both scanners.
Image sizes are automatically determined by .raw file size. As color depth it will always assume 16bit/channel. You don’t need to enter data manually. Also you can have mixed image dimensions in one folder.
The plugin “knows” the following image dimensions by default:
- 5580×2000
- 3000×2000
- 2250×1500
- 1500×1000
For image sizes other than the before mentioned (like panoramic shots), you can enter data manually in the “NEGMASTER BR SC PLANAR” plugin extension. This extension was made for the purpose of dealing with the particularities of.raw /.RAW and .b48 files while preventing functional overload in the main panel for users dealing with standard file types only.
There is no special recommendation regarding scanning from our side, because we never experienced any issues with residues of the light source or film holders like from other scanners.
Basically you will want to scan single images with 16 bit/channel .raw output. The scan settings in TLX will be like so:
- Film Format: 35mm film
- Film Color: Negative (this is true for B/W film as well; check “gray” in conversion options)
- Resolution: Base 16
- For color film you should activate scratch removal
- Leave everything else alone
Save Settings:
- Picture Selection: according to your needs
- Type of save operation: To Disk
- Image Size: Original Height and Width
- Rotation: Use Current
- Other Options: Use Scratch Removal
- File(SaveToMemory): Planar / Add File Header unchecked
After the files are saved. you would simply go to the destination folder in Bridge, select the files you want to convert and hit the Convert button in the plugin.
If you want or need to crop the files before conversion, you may want to use the mklin option first for converting the .raw files to tif.
Planar RAW files usually give very good results out of the box. But reds and oranges tend to be very saturated. You may want to try one of the planar RAW correction ICC profiles from the “NEGMASTER BR SC – Profiles” folder on your desktop or modify the defaults.xmp according to your needs.
Recommended output profile for converting planar RAW files in Negmaster BR is sRGB or RAW RGB.
“Planar” .raw files from Noritsu scanners
Planar .RAW files have no header metadata. Hence it’s difficult for a program to automatically convert them without knowing the image dimensions or bit depth etc…
Basically, we’re dealing with files from two series of devices. The first is Pakon files from TLX client demo and the second is files from Noritsu scanners. Both series of scanners are using different output image dimensions, resulting in different image filesizes. The file extension from TLX client demo is always “.raw” while from Noritsu scanners it’s “.RAW” in capital letters.
When converting .raw files from Noritsu, please make sure the file extensions are always written in uppercase letters, because the plugin uses the difference between lowercase and uppercase letters to determine the conversion method.
Image sizes are automatically determined by .RAW file size. As color depth it will always assume 16bit/channel. You don’t need to enter data manually. Also you can have mixed image dimensions in one folder.
The plugin “knows” the following image dimensions by default:
- 3711×5028
- 4937×5028
- 6079×5028
- 7317×5028
- 4937×5028
- 5010×5028
- 4036×5028
- 5185×5028
- 5256×5028
- 9972×5028
- 10379×5028
- 3859×5028
- 7158×4502
- 3551×4502
- 12681×4502
- 11348×4502
- 4042×6391
After the files are saved from scanning you would simply go to the destination folder in Bridge, select the files you want to convert and hit the Convert button in the plugin. If you want or need to crop the files before conversion, you may want to use the mklin option first for converting the .RAW files to tif.
Planar RAW files usually give very good results out of the box. Reds and oranges are very saturated. You may want to try the planar RAW “Deep Warm” ICC profile from the “NEGMASTER BR SC – Profiles” folder on your desktop, that gives a typical punchy minilab look and unifies overall saturation.
For image sizes other than the before mentioned, you can enter data manually in the “NEGMASTER BR SC PLANAR” plugin extension. This extension was made for the purpose of dealing with the particularities of.raw /.RAW and .b48 files while preventing functional overload in the main panel for users dealing with standard file types only.
Recommended output profile for converting planar RAW files in Negmaster BR is sRGB or RAW RGB.
“Planar” .b48 files from Konica R1 DS-10000 Scanner
Planar .b48files have no header metadata. Hence it’s difficult for a program to automatically convert them without knowing the image dimensions or bit depth etc…
Image sizes are automatically determined by .b48 file size. As color depth the plugin will always assume 16bit/channel. You don’t need to enter data manually. Also you can have mixed image dimensions in one folder.
The plugin “knows” the following image dimensions by default:
-
7424×4986
-
3072×2048
-
1831×1230
-
1536×1024
-
768×512
After the files are saved from scanning you would simply go to the destination folder in Bridge, select the files you want to convert and hit the Convert button in the plugin. If you want or need to crop the files before conversion, you may want to use the mklin option first for converting the .b48 files to linear tif.
Planar b48 files usually give very good results out of the box. Reds and oranges are very saturated. You may want to try the planar RAW “Deep Warm” or “Creamy Minilab” ICC profile from the “NEGMASTER BR SC – Profiles” folder on your desktop, that gives a typical punchy minilab look and unifies overall saturation.
For image sizes other than the before mentioned, you can enter data manually in the “NEGMASTER BR SC PLANAR” plugin extension. This extension was made for the purpose of dealing with the particularities of .raw /.RAW and .b48 files while preventing functional overload in the main panel for users dealing with standard file types only.
Recommended output profile for converting planar RAW files in Negmaster BR is sRGB or RAW RGB.
FFF files from Hasselblad / Imacon / Flextight scanners
FFF files are basically .tif files with a different file extension. Although the plugin will automatically recognize and convert .fff files, we recommend renaming the files to .tif. Simply because Bridge can’t preview .fff files and you won’t be able to use the Crop plugin extension or ACR for croppping prior conversion. So please only directly convert .fff if you are sure that the images don’t need to be cropped to image content / were already cropped to image content in the scanning software.
DT files from Creo / Scitex scanners
DT files are basically .tif files with a different file extension. Although the plugin will automatically recognize and convert .dt files, we recommend renaming the files to .tif. Simply because Bridge can’t preview .dt files and you won’t be able to use the Crop plugin extension or ACR for croppping prior conversion. So please only directly convert .dt if you are sure that the images don’t need to be cropped to image content / were already cropped to image content in Oxygen.
Workflow – File preparation before conversion
Cropping / Orientation / Rotation
Thanks to the concept of NEGMASTER BR you only need to prepare cropping the scan to image content. You only need to do this if
- you didn’t already crop correctly in the scanning software
- the scan shows something that doesn’t belong to the scene’s content (sprocket holes, remains of the scanner’s light source or film holders)
Slight remains of the film leader are ok if you want the shadows in your image content to stay ‘open’, otherwise NEGMASTER BR will search for the black point in the scene itself, what will crush the blacks a bit. But generally it does that in a ‘pleasant way’ by transferring a gamma curve, that is similar to common wet printing paper. However, if you want to preserve more details in your shadows, we recommend scanning and converting with a bit of film leader.
Image orientation will always automatically be rotated and mirrored into their original orientation before conversion. This means, you should not care for image orientation before conversion. Instead just crop if needed and rotate/mirror the result after conversion.
Rotations in angles other than 90, 180, 270 are currently not supported.
Film borders with sprocket holes
Converting with film border / sprocket holes is in beta status.
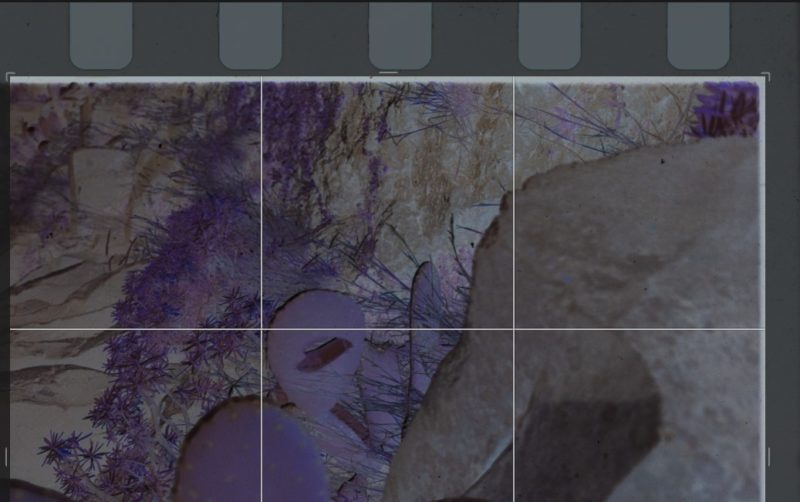
When converting with sprocket holes that are to be revealed after conversion, you should crop the scan in ACR like shown in the image below.
Make sure you are cropping exactly between the sprocket holes and the image content. When you’re finished, you can check the reveal checkbox in the conversion options and the border with sprocket holes will be revealed after conversion is done.
If you don’t do that accurately, it can happen that there will be visible differences between the inner and outer crop that are not easy to fix.
The Crop Plugin Extension
The crop plugin extension can be found in the Bridge top menu bar under “windows > extensions > NEGMASTER BR SC CROP”. It extends the plugin by adding sliders for cropping images directly in bridge without adding functional overload in the main plugin.
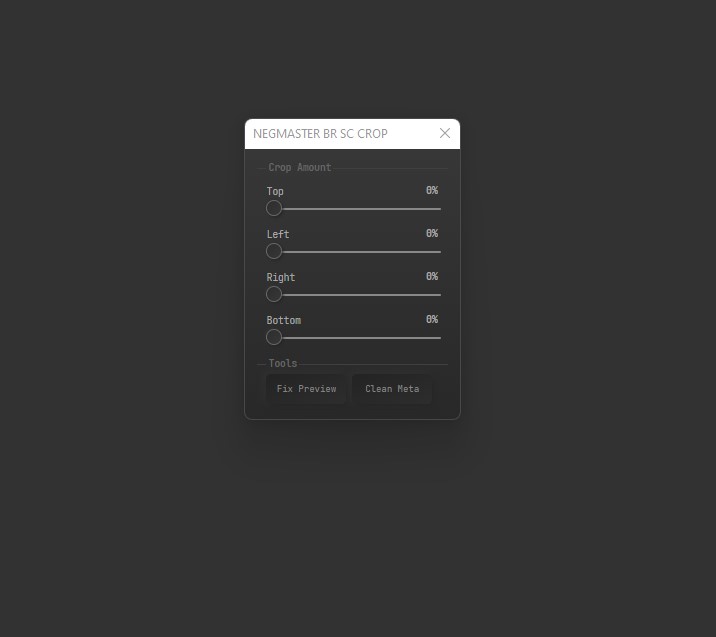
The crop extension is primarily useful for users without paid Adobe cloud subscription, who can’t use Adobe Camera Raw for croppping.
Crop Amount
Crop Amount adjusts the percentage of cropped pixels from edge inwards based on original image orientation. If the original image orientation is not true (the image is rotated/flipped/flopped), cropping will still happen in original image orientation.
This means if you’re experiencing cropping on the “wrong side” of an image, the image is not in original orientation. You may better rotate to original orientation before proceeding for better ease of use. However, the final image after conversion will be croppped according to the changes you see while cropping. No matter what the orientation was while cropping.
Changes are only written to metadata, means this method of cropping has a “non-destructive” effect on pixels.
The maximum possible amount of cropping is 10%
Default: 0%
Tools
EXPERIMENTAL! DON’T USE THESE BUTTONS WITHOUT REASON!
Fix Preview: You may come across images that apparently can’t be cropped. This mostly happens when there is junk metadata in the file header. This button tries to fix this as an alternative to “set camera raw defaults” in ACR, which is only accessible for users with paid cloud subscription.
Clean Meta: Removes all metadata that is not needed by Camera RAW (if possible) and rebuilds exif data. This will remove file history and tags written by the scanning software and Bridge. Be careful with this. Especially when working with .dng from Silverfast, which writes plenty of tags for use in their proprietary editing software.
Will fix images from Silverfast 6.x and earlier not converting.
The Planar Plugin Extension
The Planar plugin extension can be found in the Bridge top menu bar under “windows > extensions > NEGMASTER BR SC PLANAR”. It extends the plugin by adding a possibility to enter custom image dimensions for Pakon .raw and Noritsu .RAW files manually.
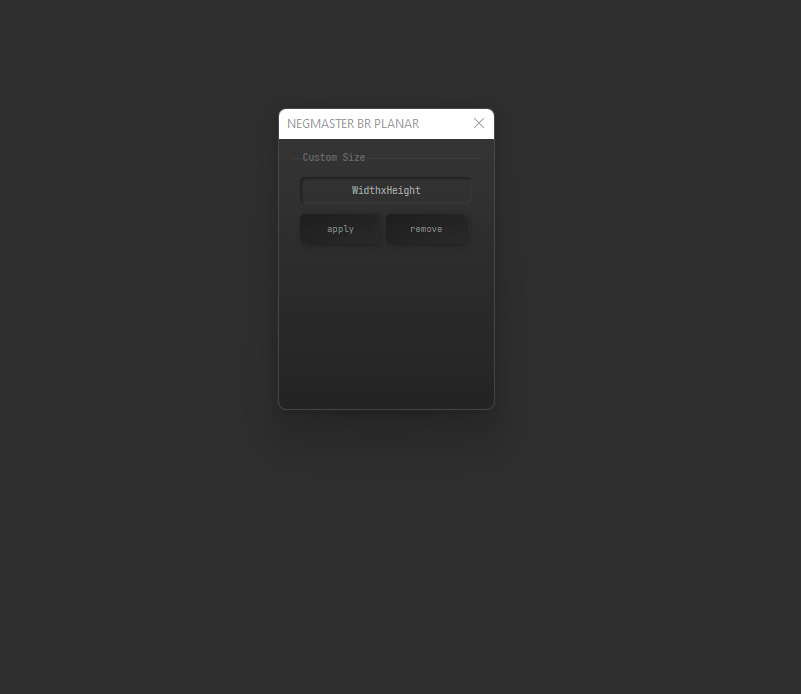
Custom pixel dimensions always have to be entered in the correct format without white spaces. This is always width first and then height: 3000×2000
Changes must be applied by clicking the “apply”-button. Removing a custom pixel dimension must always happen by clicking the “remove”-button. Simply removing the values by pressing del or backspace on your keyboard won’t work. You must click “remove”.
Under the hood, the custom dimensions are saved to a file on your disk. And every time you are converting a .raw or .RAW file, the plugin will look for the custom dimensions file in the plugin folder. If it finds it, it will use it and prefer the custom values over the standard values it “knows” for converting planar files. If it doesn’t find it, it will simply use the values it “knows” from it’s own code. What the “remove” button does, is removing the custom dimensions file from disk, what forces the plugin to use known values from code.
It can happen that you are converting an image with wrong custom dimensions, or you are trying to convert an image with unknown dimensions. In that case the plugin will report success for conversion (blinking green ring), but it won’t write an image file to disk.
Default: “WidthxHeight”
Workflow – ICC Profiles
Purposes
Negmaster BR understands three different kinds of profiles:
- ICC input profiles
- ICC correction profiles
- XMP non destructive profiles
Although you can use any ICC profile in NEGMASTER BR, they can serve different purposes. You can build ‘Look’ profiles for achieving a special look. Maybe like the common sense of a minilab scan. Just like you would use a 3D Lut or a preset in Lightroom.
You can build a correction profile, if you are experiencing results you dislike on a regular basis. Like for example skin tones that appear too saturated or cyanish skies. Maybe you want to use the 3D Luts from your video work for your conversions?
Or you could even go scientific and profile your scanner with an IT8 target with the help of programs like DCamProf, Lumariver or Basiccolor. Or you just use the IT-8 profiles you made in Vuescan or Silverfast. Basically, there is no limit.
Also you can make use of XMP settings for Camera RAW/Lightroom
Creating look / correction profiles in Photoshop
ICC profile creation is very easy in Photoshop. Let’s say you dislike something in the results from NEGMASTER BR. Maybe it isn’t the program’s fault, maybe it’s related to scanner calibration. That doesn’t matter at this point. Something that repeats over and over again, that is annoying to correct every single time. Like a cyanish sky for having a simple example.
All you need to do is converting one of the images that have this problem. You will want RAW RGB as output color space. Then open the resulting TIF image in Photoshop. Preferably you won’t change the color space to anything else while importing. But that won’t make that big of a difference. Do as you like for now.
Then you would do something against the cyanish sky. Let’s say you would create a selective color adjustment layer and remove greens and yellows from the blues.
After you have done that, head over to the PS menu bar > File > Export > Color lookup tables.
In the next dialog enter a name for the profile and a quality of 64. For format check ‘cube’ and ‘ICC profile’. Then save both files to disk and you’re done. The ICC profile can be loaded in NEGMASTER BR and will be applied during conversion process.
The additional .cube file can later be loaded in PS. There you can refine it further and save it again as cube and ICC files if you find it neccessary to change more than just the sky or in case you are unhappy with your profile.
One last thing: make sure you are working with adjustment layers only! Changes on pixel level or masks won’t work.
Creating IT-8 Profiles
*under construction*
Editing the defaults.xmp preset template
NEGMASTER BR needs to write default metadatata to a resulting file for several reasons. This metadata contains a default set of Camera RAW adjustments.
By default all values in the metadata is zeroed or equals the Adobe Camera Raw standard definitions for importing new files. Like “sharpness: 25”.
Since NEGMASTER BR SC 1.2 we offer users to edit the defaults.xmp template that comes with the plugin. It resides in the plugin installation folder:
c:\Users\[username]\AppData\Roaming\Adobe\CEP\Extensions\com.negmaster.bridge\xmp\defaults.xmp
You can open and edit this file with any text editor and change the values to your liking.
NEGMASTER BR will use this template for writing metadata after conversion.
So for example if you want to change the default sharpening, color grading or whatever value, you can do this here. Even if there is no slider for the value in NEGMASTER BR you will see the changes in the image after converting.
Since this is metadata, it works nondestructively. When opening the file in ACR or LR you can see that the settings changed according to your changes in the default xmp.
Values you can change:
<crs:ProcessVersion>11.0</crs:ProcessVersion>
<crs:WhiteBalance>As Shot</crs:WhiteBalance>
<crs:IncrementalTemperature>0</crs:IncrementalTemperature>
<crs:IncrementalTint>0</crs:IncrementalTint>
<crs:Exposure2012>0.00</crs:Exposure2012>
<crs:Contrast2012>0</crs:Contrast2012>
<crs:Highlights2012>0</crs:Highlights2012>
<crs:Whites2012>0</crs:Whites2012>
<crs:Blacks2012>0</crs:Blacks2012>
<crs:Texture>0</crs:Texture>
<crs:Clarity2012>0</crs:Clarity2012>
<crs:Dehaze>0</crs:Dehaze>
<crs:Vibrance>0</crs:Vibrance>
<crs:Saturation>0</crs:Saturation>
<crs:ParametricShadows>0</crs:ParametricShadows>
<crs:ParametricDarks>0</crs:ParametricDarks>
<crs:ParametricLights>0</crs:ParametricLights>
<crs:ParametricHighlights>0</crs:ParametricHighlights>
<crs:ParametricShadowSplit>25</crs:ParametricShadowSplit>
<crs:ParametricMidtoneSplit>50</crs:ParametricMidtoneSplit>
<crs:ParametricHighlightSplit>75</crs:ParametricHighlightSplit>
<crs:Sharpness>40</crs:Sharpness>
<crs:SharpenRadius>1.0</crs:SharpenRadius>
<crs:SharpenDetail>25</crs:SharpenDetail>
<crs:LuminanceSmoothing>0</crs:LuminanceSmoothing>
<crs:ColorNoiseReduction>0</crs:ColorNoiseReduction>
<crs:HueAdjustmentRed>0</crs:HueAdjustmentRed>
<crs:HueAdjustmentOrange>0</crs:HueAdjustmentOrange>
<crs:HueAdjustmentYellow>0</crs:HueAdjustmentYellow>
<crs:HueAdjustmentGreen>0</crs:HueAdjustmentGreen>
<crs:HueAdjustmentAqua>0</crs:HueAdjustmentAqua>
<crs:HueAdjustmentBlue>0</crs:HueAdjustmentBlue>
<crs:HueAdjustmentPurple>0</crs:HueAdjustmentPurple>
<crs:HueAdjustmentMagenta>0</crs:HueAdjustmentMagenta>
<crs:SaturationAdjustmentRed>0</crs:SaturationAdjustmentRed>
<crs:SaturationAdjustmentOrange>0</crs:SaturationAdjustmentOrange>
<crs:SaturationAdjustmentYellow>0</crs:SaturationAdjustmentYellow>
<crs:SaturationAdjustmentGreen>0</crs:SaturationAdjustmentGreen>
<crs:SaturationAdjustmentAqua>0</crs:SaturationAdjustmentAqua>
<crs:SaturationAdjustmentBlue>0</crs:SaturationAdjustmentBlue>
<crs:SaturationAdjustmentPurple>0</crs:SaturationAdjustmentPurple>
<crs:SaturationAdjustmentMagenta>0</crs:SaturationAdjustmentMagenta>
<crs:LuminanceAdjustmentRed>0</crs:LuminanceAdjustmentRed>
<crs:LuminanceAdjustmentOrange>0</crs:LuminanceAdjustmentOrange>
<crs:LuminanceAdjustmentYellow>0</crs:LuminanceAdjustmentYellow>
<crs:LuminanceAdjustmentGreen>0</crs:LuminanceAdjustmentGreen>
<crs:LuminanceAdjustmentAqua>0</crs:LuminanceAdjustmentAqua>
<crs:LuminanceAdjustmentBlue>0</crs:LuminanceAdjustmentBlue>
<crs:LuminanceAdjustmentPurple>0</crs:LuminanceAdjustmentPurple>
<crs:LuminanceAdjustmentMagenta>0</crs:LuminanceAdjustmentMagenta>
<crs:SplitToningShadowHue>0</crs:SplitToningShadowHue>
<crs:SplitToningShadowSaturation>0</crs:SplitToningShadowSaturation>
<crs:SplitToningHighlightHue>0</crs:SplitToningHighlightHue>
<crs:SplitToningHighlightSaturation>0</crs:SplitToningHighlightSaturation>
<crs:SplitToningBalance>0</crs:SplitToningBalance>
<crs:ColorGradeMidtoneHue>0</crs:ColorGradeMidtoneHue>
<crs:ColorGradeMidtoneSat>0</crs:ColorGradeMidtoneSat>
<crs:ColorGradeShadowLum>0</crs:ColorGradeShadowLum>
<crs:ColorGradeMidtoneLum>0</crs:ColorGradeMidtoneLum>
<crs:ColorGradeHighlightLum>0</crs:ColorGradeHighlightLum>
<crs:ColorGradeBlending>50</crs:ColorGradeBlending>
<crs:ColorGradeGlobalHue>0</crs:ColorGradeGlobalHue>
<crs:ColorGradeGlobalSat>0</crs:ColorGradeGlobalSat>
<crs:ColorGradeGlobalLum>0</crs:ColorGradeGlobalLum>
<crs:AutoLateralCA>0</crs:AutoLateralCA>
<crs:LensProfileEnable>0</crs:LensProfileEnable>
<crs:LensManualDistortionAmount>0</crs:LensManualDistortionAmount>
<crs:VignetteAmount>0</crs:VignetteAmount>
<crs:DefringePurpleAmount>0</crs:DefringePurpleAmount>
<crs:DefringePurpleHueLo>30</crs:DefringePurpleHueLo>
<crs:DefringePurpleHueHi>70</crs:DefringePurpleHueHi>
<crs:DefringeGreenAmount>0</crs:DefringeGreenAmount>
<crs:DefringeGreenHueLo>40</crs:DefringeGreenHueLo>
<crs:DefringeGreenHueHi>60</crs:DefringeGreenHueHi>
<crs:PerspectiveUpright>0</crs:PerspectiveUpright>
<crs:PerspectiveVertical>0</crs:PerspectiveVertical>
<crs:PerspectiveHorizontal>0</crs:PerspectiveHorizontal>
<crs:PerspectiveRotate>0.0</crs:PerspectiveRotate>
<crs:PerspectiveAspect>0</crs:PerspectiveAspect>
<crs:PerspectiveScale>100</crs:PerspectiveScale>
<crs:PerspectiveX>0.00</crs:PerspectiveX>
<crs:PerspectiveY>0.00</crs:PerspectiveY>
<crs:GrainAmount>0</crs:GrainAmount>
<crs:PostCropVignetteAmount>0</crs:PostCropVignetteAmount>
<crs:ShadowTint>0</crs:ShadowTint>
<crs:RedHue>0</crs:RedHue>
<crs:RedSaturation>0</crs:RedSaturation>
<crs:GreenHue>0</crs:GreenHue>
<crs:GreenSaturation>0</crs:GreenSaturation>
<crs:BlueHue>0</crs:BlueHue>
<crs:BlueSaturation>0</crs:BlueSaturation>
<crs:ConvertToGrayscale>False</crs:ConvertToGrayscale>
<crs:OverrideLookVignette>False</crs:OverrideLookVignette>
<crs:ToneCurveName2012>Linear</crs:ToneCurveName2012>
<crs:CameraProfile>Embedded</crs:CameraProfile>
<crs:CameraProfileDigest/>
<crs:HasSettings>True</crs:HasSettings>
<crs:HasCrop>False</crs:HasCrop>
<crs:AlreadyApplied>False</crs:AlreadyApplied>
<crs:Shadows2012>0</crs:Shadows2012>
<crs:ToneCurvePV2012>
<rdf:Seq>
<rdf:li>0, 0</rdf:li>
<rdf:li>255, 255</rdf:li>
</rdf:Seq>
</crs:ToneCurvePV2012>
<crs:ToneCurvePV2012Red>
<rdf:Seq>
<rdf:li>0, 0</rdf:li>
<rdf:li>255, 255</rdf:li>
</rdf:Seq>
</crs:ToneCurvePV2012Red>
<crs:ToneCurvePV2012Green>
<rdf:Seq>
<rdf:li>0, 0</rdf:li>
<rdf:li>255, 255</rdf:li>
</rdf:Seq>
</crs:ToneCurvePV2012Green>
<crs:ToneCurvePV2012Blue>
<rdf:Seq>
<rdf:li>0, 0</rdf:li>
<rdf:li>255, 255</rdf:li>
</rdf:Seq>
</crs:ToneCurvePV2012Blue>
Workflow – Converting
Converting single images
Single images are converted by simply selecting a file in the Adobe Bridge content pane and clicking the conversion button. The image will be converted according to your settings in the conversion options. The result will be written to the folder of the source image.
Converting multiple images
Multiple images are converted by simply selecting multiple files in the Adobe Bridge content pane and clicking the conversion button. Multiple files can be selected by holding down the shift or ctrl button while clicking the thumbnails to be converted. The images will be converted according to your settings in the conversion options. The results will be written to the folder of the source images.
Metadata
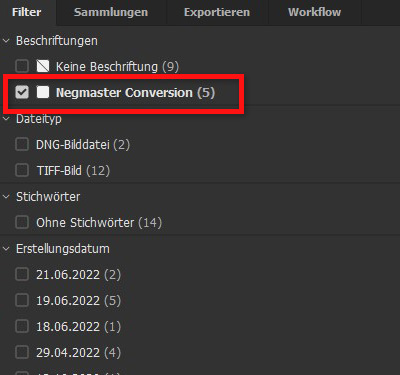
NEGMASTER BR will not touch metadata in your original scans with the exception of image orientation for DNG files. When image data enters the plugin for processing, it will make a virtual copy of the pixel information only without any metadata or profiles. After image processing is done, the plugin will write the TIF output and standard xmp metadata to disk. The metadata contains the badge ‘Negmaster Conversion’. You can find it in the filter window and use it for easy telling apart your original scans and conversion results.
Dealing with unexpected results
When talking about unexpected results, we should talk about expected results first.
Strictly spoken, automated film conversion is all about balance. The plugin will analyze the image information in it’s ‘viewport’, what is the cropped image area and it will try to balance colors and brightness to a theoretical state of neutrality. This state of neutrality is defined in the codebase of the plugin as well as logics that constantly check for ‘plausibility of correctness’.
Basically speaking there are two possible sources of error that can mess up the results:
1 – There is something in the viewport that doesn’t belong there and has nothing to do with the image/scene content. This can be flaws like
- dust, holes and scratches
- remains of the scanner light source or film holder
- the scanner’s calibration is off
- strong noise from the scanner’s sensor
- user error while adjusting scanning parameters
- developing flaws
- expired film
2 – The image has some sort of content the plugin isn’t able to balance correctly because it is contradicting the built-in logic that would have been correct for other scenes. When that happens, you need to correct that manually. For example
A Gamma (RGB midtone brightness) Balancing Issue
Scene: a night time shot with a strong vignette caused by the camera lens.
Result: The image is too bright. The plugin lifted midtone brightness because a vignette is like a dark radial gradient, covering more than 50% of the image content. The plugin decides to preserve the details in the gradient instead of crushing them.
Contradiction: The same logic would have been correct for an underexposed frame.
Correction: Adjust midtone brightness with edit sliders
A Single Channel Gamma Balancing Issue
Scene: a person with a white shirt in front of a green hedge
Result: The person’s white shirt has a magenta tint. The plugin lowered green gamma to compensate for the hedge, that covers more than 50% of the image content.
Contradiction: The same logic would have been correct for a frame with a green color cast
Correction: Adjust green/magenta tint with edit sliders
When unexpected results happen on a regular basis and the issue is always the same, you can and you should work around them with a correction profile.
Workflow – Export
Creating Export Presets
With the Export panel in Bridge, you can export your converted TIF frames to the file format you desire. By default, the Export panel is in focus when you work in the Essentials and Output workspaces in Bridge
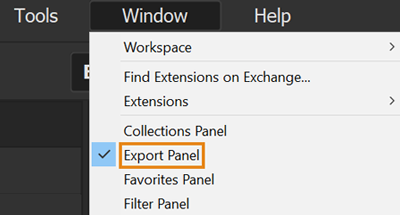
To access the export panel:
-
Navigate to Window in the menu bar.
-
From the drop down options, select Export Panel.
-
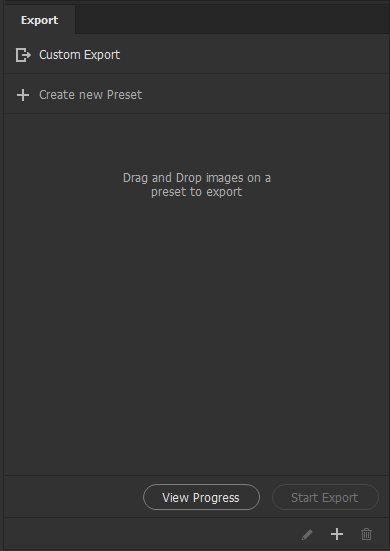
Adjust the position and width of the Export panel that opens as per your preference. In the Export panel, you can select ‘Create New Preset’.
You can create customized presets with your frequently used export settings and save them for easy accessibility in the future.
To create a new preset, do the following:
- Click the Create New Preset option in the Export panel.
- Click the add preset (
 ) icon from the bottom of the Export panel.
 - Right-click in the Export panel to bring up the context menu. Select Create New Preset.
Once the Create New Preset dialog opens, you can type a preset name and set your preferences for — Saving Options, Image Format, Image Size, and Metadata, just as you would do in Custom Export . Click the Save button in the Create New Preset dialog to save your preset and find it listed in the Export panel.
Using Export Presets
Select files from the content panel that you wish to export and do any of the following:
- Drag and drop the selected assets from the Content panel to the Custom Export option in the Export panel.
- Right-click to bring up the context menu. Select Export To > Custom Export.
- Go to File (menu bar) > Export to > Custom Export.
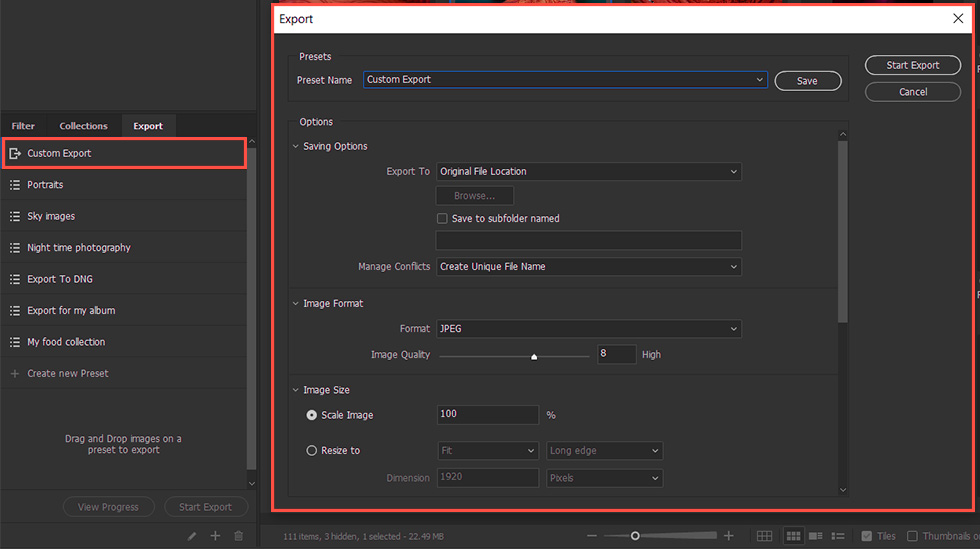
In the Export dialog that opens, type a preset name and set your preferences for — Saving Options, Image Format, Image Size, and Metadata.
Saving Options:
- Export To: Expand the drop-down option to choose a location — Original File Location and Specific Folder.
- If you select the Specific Folder option, you can further use the Browse field to set a location for your exported files.
- Enable the Save to subfolder named checkbox and type in a name to specify a subfolder location.
- You can also Manage Conflicts by selecting any of the options from the drop-down — Create unique file name, Overwrite existing file, or Skip file.
Image Format: Use this option to select a format using the Export panel. Bridge supports JPEG, DNG, TIFF, and PNG for export. Based on the format selected, you can choose from further settings.
Image Size:
- Scale: Select Scale to set a scale percentage in the Image field.
- Resize to: Select this option to resize your assets to fit or fill a target rectangle area and set the dimensions. You can resize images based on Long Edge, Short Edge, or Width/Height in the Export panel. You can also enable the Don’t enlarge option to make sure your image doesn’t get enlarged on exporting. By default, Don’t enlarge is enabled for Fit and disabled for Fill.
- On selecting Fit, you can fit your image to resize on the basis of Long edge, Short edge, or Width Height.
- Long Edge: You can manually change the Dimension and Resolution before you export your images.
- Short Edge: You can manually change the Dimension and Resolution before you export your images.
- Width Height: You can manually change the Width, Height, and Resolution before you export your images. When you select Width/Height as your Fit option, your image is resized as per a target rectangle.
- On selecting Fill, you can resize on the basis of Width Height. You can also view image thumbnails under Resize To having the original and new sizes of the images mentioned below each thumbnail.
- You can specify the Resolution of your image in Pixels/inch or Pixels/cm and Dimension metrics in pixels/inches/cm.
- On selecting Fit, you can fit your image to resize on the basis of Long edge, Short edge, or Width Height.
Image preview: You can also see a preview of your images beside the resize options to quickly look at your applied changes for Width/Height options.
- Resample Method: Choose any of the available Resample Method — Bilinear, Bicubic (best for smooth gradients), or Bicubic Sharper (best for reduction).
Metadata:
- Include Original Metadata: Select this checkbox and use the drop-down menu to choose from the metadata associated with the files that you wish to keep.
- Select the Remove Location Info checkbox to remove location specific metadata from the exported files.
- Apply Metadata Template: Select this checkbox and choose from the following field:
- Name: Choose any of the available metadata from the Name drop-down.
- Method: Select a method — Append Metadata, or Replace Metadata.
- Additional Keywords (Separated by semicolon): Use this field to add additional keywords to the files you wish to export.
Click Start Export in the Export dialog or from the bottom of the Export panel to start the export process.
Comfort Functions
Doze Mode (Dozer) & RSS
Dozer works similar to a screen saver. After a predefined time of inactivity, the main panel interface will change to an RSS feed reader. It shows feeds from blogging websites that actively deal with film photography topics. We thought something like dozer is useful for connecting the community and finding new sources of inspiration and information.
You can anytime exit doze mode by simply hovering over the preview image.
Adjusting doze time
The inactivity time until Dozer activates can be set by hovering over the clock canvas. Then the canvas will change to a round slider. Simply drag the inner circle from 0 to 360 seconds. Doze time will be saved to hard drive and the plugin will remember your adjustment
Showing previews
When hovering over single headlines Dozer will show the featured image of the blog post in the preview window while showing a tooltip box with date, author and excerpt of the particular post.
Clicking on a headline will open the blog post in your default browser.
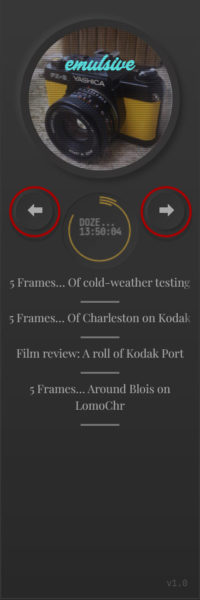
Arrow Buttons
The arrow buttons will switch between the next and the previous RSS feed.
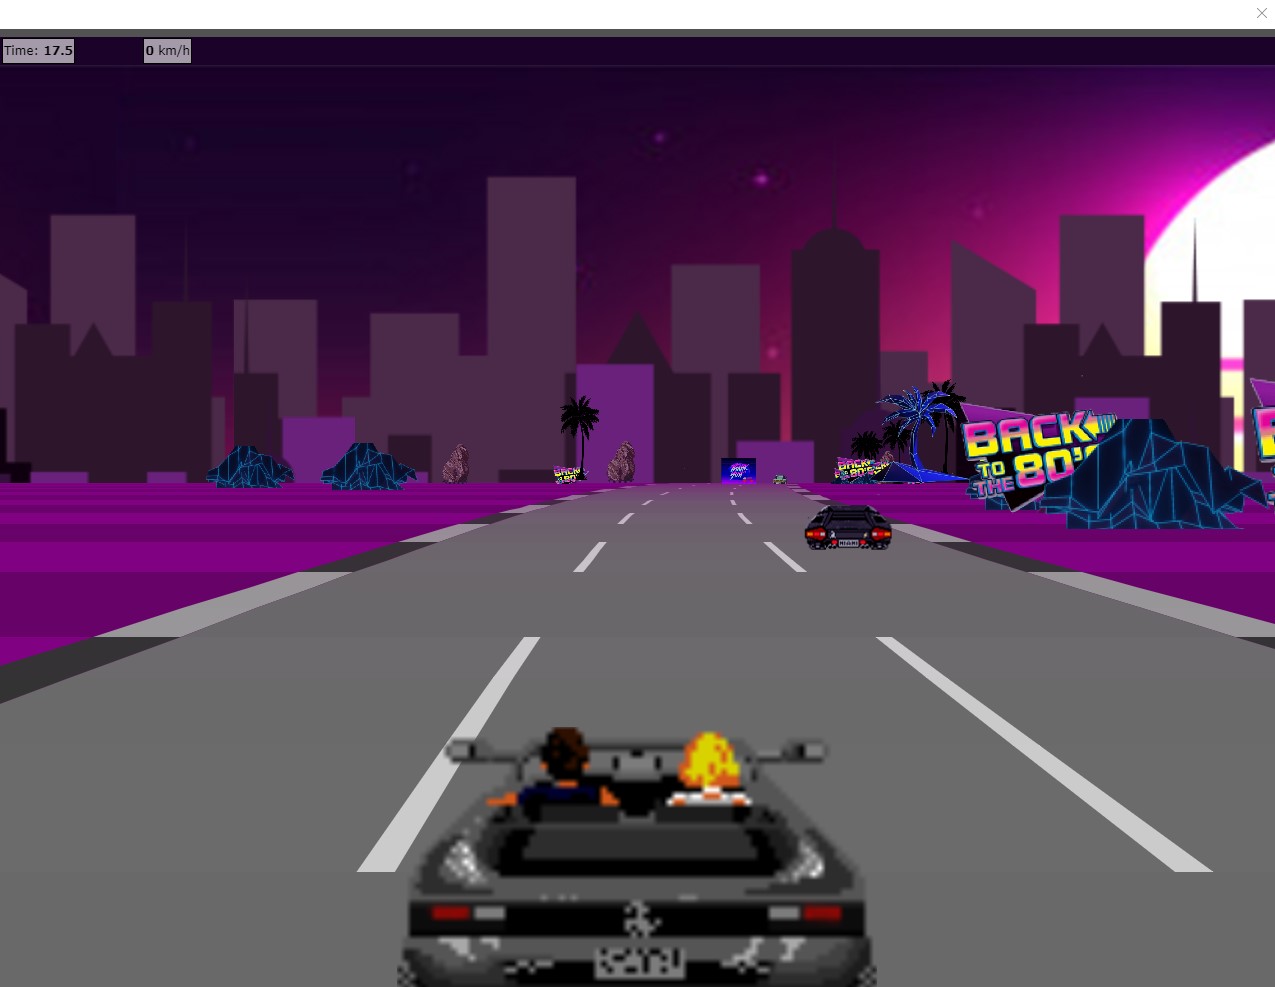
Playing Negrun
Negrun is a minigame based on Outrun. You can start Negrun from the help plugin.
This of course was more like a fun project. Although the game mechanics are kind of rudimentary, it’s really fun and helps relaxing your brain if you’re stuck in editing or waiting for conversions to finish. The colors in the game (neutral gray street and purple background) were specially chosen for relieving eye-strain from correcting color casts.
Simply click in the game window and then press accelerate. If you like you can share your lap time in the Negmasters Facebook group.
Keyboard layout:
- W – accelerate
- S – steer left
- A – steer right
- D – brake
If you like the music visit Azul Cobalto on Spotify. He is a Negmaster user.
Uploading to Negmaster Cloud
Workflow – Contact Sheets
In Adobe Bridge’s content panel, select the thumbnails you want to generate a contact sheet from. Then simply click on the generate button in the Contact Sheet Options ‘Final’ section. The contact sheet will be generated according to your settings.
Please note that generating contact sheets from TIF results will happen without the changes you made in post, because contact sheets are based on pixel data. The changes you make to TIF files are stored in .xmp metadata. Hence, instead of generating contact sheets from TIF files, we recommend generating contact sheets from exported JPG files, in which the post editing is ‘burned in’ on a pixel basis.
Changelog
v2.1.1 – 26-11-2025
- fixes rotate and mirror buttons not disabling when unconverted files are selected (Thanks Philippe Gervaise)
- fixes an issue with ICC profiles shown as “undefined” when user cancels file dialog (Thanks Luke Trexler)
- fixes Peeker Module not converting .tif files (Thanks Mats Fagerberg)
- fixes Peeker, Separator and Matcher showing wrong thumbnails(Thanks Mats Fagerberg)
- fixes Windows installer not fully wiping application folder when updating
- fixes wrong calculation of thread count
- fixes analysis not working with slide film
- fixes linear workflow for non-exotic file types. You can now also linearize your ordinary digital photos for full dynamic range
v2.1.0 – 20-11-2025
Functionality Upgrades
- adds drawing manual masks in Settings Module > Conversion > Advanced Options
- adds cross-module sync for editing sliders / color wheels
- adds update notification modal
- adds whatsnew modal
User can choose between automatic content detection or hand-drawing a content rectangle. The currently selected thumbnail will be shown on a canvas once the manual option is selected. The user can manually draw a rectangle. After the rectangle is drawn, the Peeker Module will automatically update – rendering a new preview for user convenience. The manually drawn rectangle percentiles will be saved to settings.json. Following conversions will use this rectangle, overriding the auto content detection until user switches back to auto mode.
Fixes
- fixes before/after buttons in Slider module
- fixes color space transformation issue using IWB in combination with input profiles
- fixes module selector panel not showing up when using the button in Master module
- fixes midtone slider in Master module on sync showing ‘0’ instead of ‘1’
- changes Launcher module icon colors to less intrusive in dock mode
v2.0.2 – 14-11-2025
- lowers CPU usage on idle
- improved performance
- fixes Peeker panel not changing theme
- fixes update notification service in Master panel
v2.0.1 – 13-11-2025
- fixes an issue where Separator starts and closes immediately
- fixes nullptr error on Windows and MacOS on Bridge startup
v2.0.0 – 09-11-2025
Fundamental Change of Code Architecture
We added a complete set of new modules, changed the workflow and merged many options for better consistency and convenience.
Modules have now been removed from the Adobe Bridge Windows menu und have been merged in the module launcher panel, which can be reached from the main panel by clicking on the module selection button
– DSLR file formats now natively supported
Supported file types: “raw”, “RAW”, “b48”, “dt”, “fff”, “dng”, “tif”, “tiff”, “nef”, “cr2”, “cr3”, “arw”, “orf”, “pef”, “rw2”, “raf”, “srw”.
– Automatic film content detection. Negmaster BR will automatically mask out remains of film borders, sprocket holes and film holders (make sure your scans are crisp for this to work properly). You can now keep the sprocket holes and no more need to crop them away prior conversion.
– New automatic clipping detection – this no longer requires manually adjusting “trim” and always auto-detects the correct settings on runtime. But the old option is still there and you can choose between the two.
– New IWB (Intelligent White Balance) function – prior to V2.0 we worked with Adobe’s automatic white balance (AWB), which often lead to inaccurate color balance. IWB transforms all pixels to LAB color space in flaot32 precision, where they are corrected using A and B channels only. Then we transform them back to RGB without changes in lightness. Though being a destructive process on pixel basis, it’s much more accurate exactly because of that and the underlying algorithms. If you want you can even combine AWB and IWB, which is still better than AWB alone.
– Theming engine allows for choosing between three different themes (light,neutral,dark) from the settings panel. Changes will be applied live across all modules
New Modules
New Central Settings Module
– Centralized settings panel for all modules under one roof. You can adjust all old and new features here. This is now also the place to deactivate your license key or adjust your planar files dimensions.
– Auto-Start Configuration: Customize which modules launch automatically
New Module Launcher module
– An immersive GPU accelerated 3D room (OpenGL) for launching and introducing modules
– Quickstart buttons for each module on the right side of the bezel
New Layerscope Module
– A new approach on working with histogram data
– Instead of showing pixel intensities in a bar graph, we are separating the image into layers by criteria
New Viewer Module
– Render preview conversions on the fly with resolution scaling from 10 to 100%
– Changes in the Central Settings module will instantly trigger a new conversion with the settings of your choice for previewing the end result
– Allows for exporting previews as tif or jpg in any resolution. Very convenient for social media posts
– Showing the effects of live editing with sliders better than Bridge’s own preview. No more blurrying while live updates
– Rotate and flip/flop buttons
– Zoom in and out up to 200%
New Analysis Module
Originally written for debugging the new content detection and auto clip functions we thought this would be a great addition to your toolset in case some image doesn’t fonvert the way you want and you want to find out why.
– Border Detection Live: Real-time border analysis with visual feedback while conversion
– RGB Level Visualization: Individual channel level displays with precise numeric values
– Histogram Comparison: Before/after histogram views for quality assessment
– Auto-Leveling Preview: Live preview of automatic level corrections
New Color Wheels Module
– Interactive White Balance Wheel: Drag-to-adjust temperature and tint controls
– Highlights/Shadows Color Grading: Independent color wheels for selective adjustments
– Real-time Preview: Instant visual feedback for color adjustments
Enhanced Histogram Module
– Multi-Color Space Support: LAB, RGB, CMY, and Luminance modes
– Color Analysis Tools: Average color display and hue/saturation analysis
– White Balance Delta Visualization: adjustment indicators according to grey world theory
– Statistical Overlay: Real-time average, median, and standard deviation
– Average and average complimentary color calculation and visualization
– visualization of LAB deviation for easy comparison of WB between images
New Planar Module (moved into Central Settings)
– Better feedback for applied and removed custom image dimensions
– better input mask with live checking for typos
– Thumbnail Generation Control: Auto-generate thumbnails for exotic and usually unreadable formats
New System Log Module
– Real-time Monitoring: Live system event logging
– Debugging Information: Detailed process tracking for troubleshooting
– Export Capability: Save and search logs for technical support
– Auto-scroll Interface: Automatic scrolling to latest entries enable/disable
New Unisono Chat Module
– Self hosted community chat system that communicates over all Negmaster programs. Also anytime available in your web browser: https://negmaster.com/mobile/chat.html.
– Talk to the developer or experienced users. Supports image uploads with histogram generation
– Full res image view with 1:1 scaling without compression
– Private messages with other members
– Photostyle analysis – we analyze every photo you upload and calculate your average photography style for comparison with others
– Rival other members in NEGRUN, an 8bit style racing game. Lap times are shown live in the chat
– No adds, no data robbing – choose a username and password, we don’t even want to know your email adress
Negrun overhaul
– Negrun now supports online high scores. Also we added sound effects and did some fine tuning on the UI and overall look and feel, like gauges and smoke effects. From now on it is hosted online, reachable from the Unisono chat module menu
Enhanced Core Features
New AWB
Advanced PrePost Module
– all sliders now working with keyboard arrow keys
– Cropping now working without distorting the preview image
– Preset Management: Save, load, and organize custom adjustment presets
– Film Gamma Controls: Adjustable gamma values for different film stocks
– RGB Clipping Options: Intelligent and manual highlight/shadow clipping
Enhanced Main Extension
– Copy/Paste Metadata: Two-click XMP metadata transfer between images
– Module Launcher: Quick access to all specialized tools
– Improved Options Panel: Expanded conversion modes and process controls
– Tethered Workflow: Source folder monitoring for automatic processing improved in reliabilty
Technical Improvements
– DSLR scans now natively supported
– all editing sliders and color wheels now working with keyboard arrow keys
– Format Support: Extended file format compatibility (supported formats: .raw, .RAW, .b48, .dt, .fff, .dng, .tif, .tiff, .nef, .cr2, .cr3, .arw, .orf, .pef, .rw2, .raf, .srw, .x3f)
– native Apple Silicon binaries
– Improved error messages and error handling
Interface Enhancements
Usability Features
– Window Management: Resizable modules with multi-monitor support
Workflow Enhancements
Performance Optimizations
– Faster Processing: Optimized algorithms for quicker conversions
– Memory Management: Improved RAM usage for large batch operations
– Smart Caching: Intelligent preview generation and caching
– conversion duplicates now support infinite suffixes: _1,_2,_3…etc
Loads of bugfixes.
v1.5.1
Functionality Upgrades
- Introducing the System Log module
- Introducing Pre-Saturation
- PrePost module: Introducing “before/after” buttons
- Added live slider values sync between main and PrePost module
- Added single channel (grayscale) conversion
- Added possibility of manually unlocking the interface by clicking on the lock icon
- Output as compressed .tif 8 bit
- Output as uncompressed tif 16 bit
- Live notifications about plugin activity at the bottom of the content pane
Bugfixes / Improvements
- Folder tethering will no longer detect temp files written by Silverfast
- Files that can’t by synced, won’t be synced (fff,dt,b48,x3f,raw,RAW)
- Pakon/Noritsu/Konica DS fixed wrong gamma for slides in compute mode
- Softer automatic (default) histogram clipping
- When switching conversion modes options are saved to local storage
- Improved error handling
- Improved speed for writing meta data to converted file
- Fix presets not saving/applying when certain options were used
- Fix interface not unlocking after conversion
- Fix cast sliders not self adjusting to color hue on sync
- Fix mkLin files skipped when trying to convert
- Fix mkLin .tif files not being able to edit with plugin sliders
v1.5.1 – 31-10-2022
Functionality Upgrades
- Source and target image rotated back to custom orientation after conversion
- Existing target images won’t be overwritten. Instead a “+” will be added (for one time)
Bugfixes
- fix modified time stamp when source image in original orientation
- fix tif compression not working
- fix output to jpg instead compressed tif
- fix “write permission error” when activating
- fix Negrun not working
v1.5.0 – 29-10-2022
Functionality Upgrades
- introducing the PrePost module including
- 7 tabs with more than 60 new image editing functions
- “Basic” tab for the most used editing sliders
- “HSL” tab allows editing Hue, Saturation and Lightness
- “Cast” tab for removing/creating color casts in different brightness areas separately
- “Crop” tab for cropping images prior or after conversion
- “Details” tab for sharpening and noise reduction
- “Preset” tab allows for saving, loading, and applying settings presets in .json format
- “Advanced” tab allows to manually set histogram clipping and film gamma for use with conversion
- merged croppper module with PrePost module
- added working “Copy Settings” for users without paid cloud subscription
- added “Before and After” buttons for comparing changes made to output images
- added a button for applying auto WB to selected images
- added a checkbox for applying auto WB while converting
- added support for transferring custom metadata from source to target file while conversion
- added “Profile Only” conversion workflow
- added “Folder Tethering” for automatic conversion of newly created images
- added possibility of selecting a different output folder
- added support for output to .jpg
- added support for editing output .jpg
- .nef support for Nikon scanners
- added conversion for single channel gray scale .tif (.dng may work or not depending on the scanning program/settings)
- added native Apple Silicon support for upcoming native Adobe Bridge
- changed algorithm for RGB gamma color balance
- added blurring and declick UI while conversion for preventing accidental user input
- speeding up conversion by 15%
- added checkbox for deactivating/activating “Dozer” screensaver
- removed ICC selection from Conversion Options
Bugfixes
- fix reveal not working on Mac
- fix some Silverfast scans not converting
- fix contact sheet background color on Mac
- fix conversion will only generate thumbnails
- fix installation bug on Mac
v1.4.3 – 2022-08-07
- MacOS: Added uninstaller included in the installation .zip file
v1.4.2 – 2022-08-07
- MacOS: Fixed adding and removing ICC profiles not working
- MacOS: Fixed installer “The installation failed”
v1.4.1 – 2022-08-05 MacOS public Pre-Release
- Added support for MacOS (M1/2 native & Intel)
- Introducing “planar” .b48 file conversion for Konica DS-1000 R1
- fixed too many program calls from correction sliders
v1.3.1 – 2022-07-29
- Hotfix: added possibility to fix entries in ExifIFD0 for Silverfast 6.4 .tif files with Crop Plugin extension’s Clean Metadata button
v1.3 – 2022-07-28 Windows x64 public Pre-Release
- Introducing “planar” .raw/.RAW file conversion
- Introducing Flextight .fff file conversion
- Introducing Creo Scitex .dt file conversion
- Introducing the Crop plugin extension
- Introducing the Planar plugin extension
- Introducing the mklin checkbox
- Added correction profiles
- Added possibility to fix entries in ExifIFD0 for Silverfast 6.4 .tif files
- Fixed minor bugs
v1.2 – 2022-07-06
- Fixed slow performance when writing xmp meta
- Introducing ICC device input profiles (IT-8)
- Introducing the default.xmp profile
- Introducing grayscale conversion
v1.1 – 2022-07-02
- Fixed not converting Purup Eskofot Color Quartet TIF files
- Fixed issue sliders not working in the free version of Bridge
- Right click on a slider will reset it to it’s default value
- Right click on ICC shorthand will remove current profile